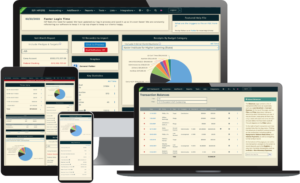
The JFC Management page is broken into three different pages: Participants, Contributions, and Transfers. When you select the option from the Accounting tab, you’ll first land on the JFC Contributions page. However, if you haven’t set up Participants first, the system will direct you to this page first, as this is needed before you can add Contributions.
Typically, the process is setting up allocation rules (Participants), then the allocation of your contributions (Contributions), then the transfer funds step (Transfers). Once you add Participants, usually steps two and three are the most common steps taken moving forward, unless a new Participant is needed. To do this click the Manage JFC Participants button at the bottom of the screen.
Participants
Prior to using the JFC Wizard, you must make sure all JFC participants have an entity record in your database. You may have to create separate entities for different funds of one organization. An example of two different funds would be General Fund vs Legal Fund. If your database contains multiple filers, those filers can also be created as a JFC Participant.
On the JFC Participants page, you’ll set the allocated amounts as found in your joint fundraising agreement.
First, click the Add Joint Fundraising Participant button at the bottom of the screen.
In the window that appears are Limit By options: Amount, Percentage, or Both. This limits this particular JFC to one or both and will determine the fields you see in the window.
Settings
Participants can be grouped and prioritized within the group. First, on the JFC Participants page, be sure to click the Settings button and check the Use Groups option. After saving this setting, click each participant to group and prioritize them. This will distribute funds accordingly within the group and according to priority value.
In Settings, you can also toggle Equal Shares. When using this allocation, all participants in the same group will receive equal shares, up to their specified limit.
Participant: Search here for the JFC entity record.
Priority: This is the order in which contributions will be allocated.
Amount: The maximum amount a contribution made by an Individual or Federal Non-Multicandidate Political Committee can donate.
Multi-Candidate Amount: The maximum amount a Federal Multicandidate Political Committee can donate.
Percentage: Percentage to be allocated.
Once you’ve added the needed details, click Add Joint Fundraising Participant, or Add & New to add the one you just added details for and create a new JFC.
If the Joint Fundraising Participant also has an ISP account, it can be linked to the Entity showing in the Participants list. You’ll then be able to automatically transfer data and transactions between accounts, including Budget Category, Election, and Financial Account.
Please note, in order for a JFC Participant committee to be added in JFC Manager the relevant Election must already be set up in both accounts.
Contributions
First and foremost, please be sure the financial account(s) accepting contributions are marked as For JFC. To do this, go to your Financial Accounts under the Lists tab, click on the name of the appropriate account, then check the For JFC box and update the financial account.
On the JFC Contributions page are all the contributions that have been deposited but not allocated. Ensure all contributions for allocations have been deposited into a financial account that is marked as For JFC. Their amounts will automatically be distributed among the JFC participants according to the rules you previously set up.
If you need to update the amounts, click on any amount and type in the new amount. Clicking outside of the amount text field will save that change. One example of a reason to update is you know the donor is at max limit for one of the participants. Please note, however, that if you make any changes to the structure of the allocation, such as Order or formula changes, the Recalculate button will then follow those rules if you click it again.
You can also download a list of the transactions by clicking Download Draft at the bottom of the page. You’ll receive an Excel spreadsheet of the allocation distributions for others to review.
Once you have confirmed all contributions are at their proper allocation amount, click on Record & Export. After you click the Record & Export button, you will not see these contributions on this screen again.
Transfers
On the JFC Transfers page, you can calculate and create the transfers.
First, enter in the Reserve amount, if any, then click the Calculate button at the bottom of the screen. You’ll receive a list of totals and items. For example, the list of Expenses are any expenses to entities other than the JFC participants. They are allocated to each Participant as per the ratio of contributions. The Advance of Funds items are Monetary Contributions received from any of the JFC Participants.
Note that the JFC Participant description is saved in the Internal Note field of the JFC transfer transaction. That is then used to do the linking for these calculations, so editing the Internal Notes will affect these calculations.
In the Transfer Amounts line item, adjust the recommended transfer amounts as you see fit by clicking in the Transfer Amounts cells and updating the amounts.
Once you have confirmed all transfers are at their proper allocation amount, click the Add Transfers as Expenses at the bottom of the screen to add expenses to the JFC participants.
It’s important to note that transfers are inherently not directly tied to contributions. It is common to not have transfers that exactly match the amounts of contributions. That said, the allocations still need to be reported, so splits are added based on dates. Specifically, any JFC allocation to that entity where:
- The JFC Allocation’s date is after the most recent transfer to the same entity
- The JFC Allocation’s date is on our before the day of the transfer


