The Reconciliation feature in ISP allows you to accurately keep track of your finances outside of ISP and ensure all transactions are financially accounted for and match your actual bank statement.
If it is your first time doing a reconciliation or you are starting a new one, you will see four bank statement fields:
- Account: The financial account to reconcile. Reconciliation is done on a financial account-by-financial account basis and is independent of the filers. Only transactions that are part of the specific financial account you select will appear.
- Closing Date: The ending date of the bank statement you are reconciling. Along with the financial account selected, only transactions equal to and older than this date will appear.
- Starting Balance: The starting balance of the bank statement for that month. If there was prior activity in the account that is not in ISP, that is factored into the number entered here.
- Ending Balance: The ending balance as indicated on the bank statement you are reconciling.
Once completed, click the Generate button to calculate the difference between the starting and ending balance and pull any transactions older than the Closing date entered.
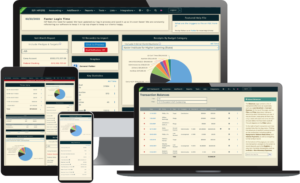
On the new screen, the Statement Summary section will display the info you added, totals for Receipts and Disbursements, and the Difference between your previously entered Starting and Ending balances. As Outstanding Transactions are selected, the totals and Difference amount will automatically adjust. To adjust the information you previously entered, click the Edit Statement Details button.
The overall goal with reconciliation is to ensure that the difference between the starting and ending balances on our statement vs starting and ending balances in our Register is $0. That indicates all transactions affecting the actual bank statement have been identified. The system will not allow a reconciliation to be applied until the Difference shows $0, at which point the Reconcile button will appear at the bottom of the screen. Until then, this button will not show.
If during this process you catch anything missing, click Continue Later at the bottom of the screen to save the work you’ve done up to that point, and leave the page to make corrections.
If your starting balance doesn’t match what was previously marked as cleared, review transactions that may have been edited since your last reconciliation. To view these transactions, click the Changed Reconciled Transactions Report link in the message.
If you have the Dropbox integration installed in your database, you’ll see the Dropbox icon in various spots when reconciling a bank statement. Use this folder to add attachments to the specific reconciliation you are working in, whether it’s a current reconciliation or you’re reviewing a previously completed reconciliation. Each reconciliation statement will have its own room for attachments specific to only that reconciliation statement.
Along with the Reconcile and Continue Later buttons at the bottom of the screen is a Past Reconciliations drop-up menu, which allows you to view past reconciliations, as well as reopen or undo the most recent reconciliation. This latter option is good for correcting previous reconciliation mistakes.
You can also view past reconciliations from the Financial Accounts screen. After navigating to Lists and then Financial Accounts, hit the hotdog menu to the right to view reconciliations for that particular account.
Upload for AI
The Upload for AI button allows you to upload a bank statement to assist with the reconciliation process. This upload will check the box of the matching transaction in the list of transactions to reconcile, as well as automatically adjust the Difference total in the Statement Summary section at the top of the page. Please note that every bank is different. If you encounter issues with your bank statement and the AI upload process, please contact Support.
Auto-Reconciliations for Historical Transactions
Reconciliations in Newly Imported Client Data
This is a feature designed for clients who have newly migrated from another database system where they were not recording reconciliations. The Auto-Reconciliation feature only appears when very specific criteria are met:
1. Over 200 transactions are yet to be reconciled in a financial account
2. No reconciliations have been recorded in ISP for that financial account
If (and ONLY if) your financial account meets both criteria, you will see the Auto Reconcile Historic Transactions among the options along the bottom of the Reconcile Bank Statement screen.
Please note that this feature does not properly reconcile transactions, but rather assumes that all historical transactions match up with what was on our bank statements. It almost always will require further manual work.
In most cases, completing the reconciliations from each bank statement will be the most accurate method. The Auto-Reconcile feature acknowledges that some clients bring in a history of data that is too long to be realistically completed and creates a baseline from which to manually reconcile from the current month in which the client began using ISP and forward.
How do I handle adding, editing, or deleting a transaction that had previously been reconciled?
Best practices are to undo reconciliations back to the relevant month, correct the transaction error, and redo the reconciliations going forward.
However, if you choose, you can include an old transaction in the current reconciliation. The reconciliation system only requires that the ending balance be $0. It will warn you if the starting balance doesn’t match but it will not prevent you from completing your reconciliation.


