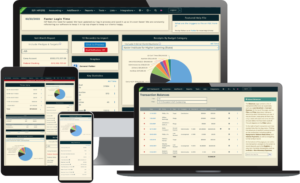
Form Builder is where you can create forms for various volunteer or similar purposes. These form pages, when used, will send the data to the Pending Imports section on your Dashboard to import the volunteers as new entity records. If you use a customized dashboard, be sure to include the Pending Imports section in the customization.
To begin, be sure the Form Builder tool has been added to your database. If you do not see it under the Tools tab, select Add/Remove Tools. On the resulting page, either use the search field to search for Form Builder or scroll down until you see it. When you see it, click it to add it to your database. Once it has been successfully added, you should see it under the Tools tab.
Once you arrive on the Form Builder page, you will see any existing Form Pages. If there aren’t any, you’ll need to add one. At the bottom of the screen are several buttons to get started.
Add Form Page: This will open up a small window where you will create the basic details of the Form Page.
Form Emails: This will redirect you to a connected page where you can create a confirmation email if the Form Page you are creating is a sign-up or donation page.
Print: This is a standard print option that will print the basic details of the Form Pages showing.
The Confirmation Email is optional so it is not necessary to create that first. However, if you do want to add a Confirmation Email to your Form Page, click the Form Emails button. On the resulting page, click the Add Form Email button at the bottom of the screen. In the small window that appears, you’ll have the ability to fully create an email to automatically send back to the individual who used the Form Page.
In the Text field, you can create the message you want to send using standard text options. There is also a Merge Fields option which instructs the system to automatically insert information into the email for you. This includes Full Name, First Name, and Amount information.
Once you complete the required fields, click the Add button to create the Form Email to add to your Form Page. To return to the Form Pages screen, click the Manage Pages button at the bottom.
Back on the Form Pages screen, click Add Form Page to create the basic details of the Form Page. In the small window that appears, complete the fields with the applicable information. The last option, Confirmation Email, will be a dropdown menu containing the Form Emails you just created or have created in the past. Once you’ve finished making selections and filling out fields, click the Add button.
On the main Form Pages screen, you’ll now see the page you created with various columns and new options.
Title: If you need to make any edits to the basic information of the Form Page, click the name to open the window and make changes.
Form Page: The Form Page link is what you will use to embed the Form Page into your website. You can copy and paste that link into the applicable location on your website. There’s an option for your forms via QR codes. Now, via the hotdog menu next to each form in your database, you can share the form’s QR code instead of the link.
Flags: If you’d like existing Flags in your database to be added to the Form Page user’s record, click the [Add] option and select the Flags you’d like to incorporate into the page. In the small window that appears, select the Flag from the dropdown. If you’d like the system to automatically add the Flag, select the Always Added option. Otherwise, select Checkbox if you’d like to give the Form Page user the choice.
Display: Here you can choose how the Form Page displays to the Form Page user and also how confirmation text appears.
- Upload Logo: When you click the Upload Logo button, a small window will appear where you can select an image from your computer. Please note the recommended image size is approximately 3.5 times wider than it is tall.
- Customize Confirmation Text: Here you can determine the message that appears on the screen after a successful use of the Form Page. This is different than the Form Email, as this is only displayed on the screen, not emailed to them.
- Other Options: If you are familiar with Css code or Google Analytics, you can use that to enhance the page and track its use.
Once you have completed all of the above, your Form Page is now ready for use.


