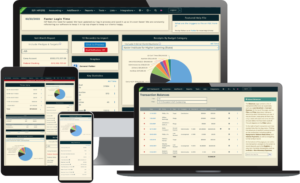
About MiTN
MI has updated their campaign finance system, which is called MiTN (Michigan Transparency Network, or “Mitten”).
While the filing is similar to MERTS – it is a group of .csv files that are uploaded into the state’s system – there are some differences.
Initial Setup
There is quite a bit of setup before the first import can be done on the new system. Please be sure this is all complete by following the steps laid out on the state’s site.
Once you have your committee set up, select your committee. You’ll land on the Dashboard, where you’ll have a series of tabs to select.
Before you can file any reports or import transactions, you have to import your contacts.
Importing Contacts
- On your computer, locate the .zip file downloaded from ISP, right click on the file, then select Extract All and follow the steps to extract the files
- Back in MiTN, on the dashboard, click on the Contacts tab
- Towards the bottom, click on Upload Contacts
- At the top, click on Choose File
- In the Browse window, locate your extracted zip file, and select the .csv that begins with 1-Contacts_Import
- Click Create Import
- The import will show on the top row, with the status of the import in the last column. If the status does not update, click on Refresh at the top.
- Click on the status message for the row of your import if you would like to see if there are any issues with the import. If there are issues, please contact support. If there are no issues and the import is complete, click on the small X on the top right to exit out of the import wizard.
- At this point, you should return back to the Contacts tab on the Dashboard – click on any contact ID (first Column) to edit as necessary.
- While the employers will import on the names import, you will have to link Employers to Individuals:
a. On the Contacts tab, click on Contact Type to sort by Individuals
b. Click on any contact ID (first Column) to edit the record
c. On the edit window, click on the magnifying glass, then start typing the Employer Name to search. Under Employer, search for Employer Name. If Employer Name does not exist, you will first have to create a new contact for the Employer.
Importing Transactions
- From the dashboard, select Filings
- If you have not done so already, set up a filing by clicking on New Filing, selecting the appropriate settings and clicking Save & Next. If you have already set up your filing, click on the filing to start.
- On the first step, Filing Type, confirm your report parameters. If they are correct, click on Save & Next
- On the second step, Additional Details, once again confirm your report parameters. If they are correct, click on Save & Next
- On the third step, Receipts, click on Choose File.
- In the Browse window, locate your extracted zip file, and select the .csv that begins with 2-Receipt_Import
- Click Create Import
- Click on the status message for the row of your import if you would like
to see if there are any issues with the import. If there are issues,
please contact support. If there are no issues and the import is complete, click on the small X on the top right to exit out of the import wizard. Unlike the contact import, you will have to refresh the full page to see the updated import status. Keep refreshing the page until the import manager is no longer visible – that will indicate your import is complete. - After your Receipt Import is complete, click Save & Next at the bottom of the page
- On the fourth step, Expenses, repeat steps 5-9, using the .csv that starts with 3-Expense_Import
- On the fifth step, Debts & Obligations, once again, repeat steps 5-9, using the .csv that starts with 4-Debt_Import
- Once your Receipts, Expenses, and Debts & Obligations are imported, on any step, click on Choose File.
- In the Browse window, locate your extracted zip file, and select the .csv that begins with 5-SubRecord_Import
- Click Create Import
- After your SubRecord Import is complete, click Save & Next at the bottom of the page
- On the sixth step, Summary, confirm the information displayed. Select Yes/No if you want all expenditures itemized, and check the box to certify your report.
- Click on Generate Summary Report to verify the per-schedule totals. MiTN DOES NOT provide a way to preview the full report, including all transactions.
- If all looks correct, click on Submit Report
Known MitN Issues
- MiTN works best in full screen view.
- MiTN does not support all web browsers. We have had the best success with Firefox and/or Microsoft Edge.
- Your user name is case-sensitive: User.Name is not the same as user.name
- According to the state:
If using public search for committees or contribution analysis, please note that the MiTN system can take approximately 1-3 hours for updates to display after the information has been uploaded into MiTN. If you believe information should be displaying and it is not, please try again later or contact the state at: CampaignFinance@Michigan.gov
For Michigan FAQ and best practices, click here.


